Learning about food, photography, and writing. Sharing what I find.

˜˜˜

Saturday, February 6, 2010

Tangy Shredded Pork

So I guess we should add Pork to the list of things I over-eat. Cookies, Pizza, and Pork. I think the Pizza and Pork parts are really a reflection of how my marriage has directed my eating patterns. I have always had a love-affair with pizza, but, in Penn, I met my pizza-loving match. Obsessed + Obsessed = Frequent Binges. Also, Penn is far less enthused by chicken than he is pork. I love both, so I haven't minded upping the pork production. In fact, I am happy with how it has expanded my cooking mind.

For example, one night I wanted to try my hand at pulled pork, something my raised-below-the-Mason-Dixon-line husband truly treasures. I knew I could never do Southern Pulled Pork justice, but I wanted something to offer him. So, I called my mother and she had found a recipe on good-old Epicurious.com. It's nothing like Southern BBQ. In fact, I think it's more of an Asian-inspired recipe. Whatever it is, its tang hits all the right taste-buds for me . . . and it's very simple.


It's filled with flavor and makes a heck of a sandwich (I'd love to hear people's favorite coleslaw recipes to go along with this stuff! I think our sandwiches could have been even better with a little slaw on top!).

I'm going to call this Tangy Shredded Pork so that you remember not to inhale too deeply when taking a bite (Have you ever choked on vinegar? IT HURTS). I had previously copied the recipe into my recipe book, but I did find the original recipe back on Epicurious. Looks like a Lemon Slaw might be a good complement for the final pork product. I honestly didn't modify the recipe too much, just changed up some of the amounts to go with the exorbitant amount of pork I had to work with.

Ingredients:
  • 1 medium onion
  • 1 clove of garlic
  • 1 Tbs. olive oil
  • 3 Tbs. cider vinegar (we ended up adding even more)
  • 1/4 cup ketchup
  • 2 Tbs. chili sauce (I found this in the Asian Foods section of my grocery store. Spicy and delicious!)
  • 1 Tbs. Worcestershire sauce (I used a heavy hand when measuring this one :)
  • 1-2 tsp. tabasco sauce (to taste)
  • 3/4 cup water
  • 1/2 tsp. salt
  • 1/4 tsp. freshly ground black pepper
  • 1 pork tenderloin, halved
Assemble the ingredients at the start, because they are all added simultaneously.
Chop Onion and mince Garlic.


Heat a heavy, deep pan over medium heat.
Coat bottom of pan with Olive Oil.
Add the onion and garlic to the pan, stirring over medium heat for about 7 minutes.


Onions should just begin to brown around the edges when done.


(Recipes that begin with sauteing onion and garlic always seem to please the audience. You just can't beat that smell.)

Stir in the remaining ingredients, except the Pork, of course. Bring to a low boil and then simmer covered over medium-low heat for about 10 minutes.


 While the sauce is simmering, remove all silver skin and excess fat from the pork.

(I am finally perfecting my silver skin removal skills! A pork loin is so much prettier without it.)

Add the now-trimmed pork to the sauce.

I was doubling the recipe. Do as I say, not as I do or you will be panicking about overflow like I did.

Simmer covered, turning occasionally, until pork is tender (About 45 minutes).


Remove the Pork to a heavy cutting board to cool (I took a picture of this, but 4 slabs of cooked, undressed pork sitting on a cutting board is not all that pretty to look at).
If necessary, cook the sauce down a little further (until slightly thickened) while the pork cools.
Purée the sauce in a blender until it is smooth.
Return smooth sauce to pot.
Place over low heat to warm.
Shred cooled pork with fingers or forks (I started with fingers and moved to forks per the suggestion of my brother-in-law. Both are good, but my impatience had led to scalded fingers when using the first method).


Add shredded pork to the pot.


Stir to coat pork with sauce and to heat pork through.


Do a taste-test to see if you need to add to the sauce (We added a bunch more vinegar and tabasco sauce at the end to bring up the punch. Some of the guys even added tabasco on top of their sandwiches).

(Penn caught me sneaking several "taste tests" before dinner)

Serve on fluffy rolls with your favorite cheese or coleslaw as topping.


 The next day I even made a hot dip out of the leftover pork. I chopped it up and stirred in some cream cheese, mozzarella, even more tabasco, baked it, and served it with tortilla chips and crackers! Oh, pork, you are so versatile.

Photo credit to Penn for the above post . . . wherever you see my hands, he is behind the camera (and some of the other ones, too).

Thursday, January 28, 2010

Honey Wheat Bagels

Ok, so I want to continue refining my baking skills, but the sweets are getting a little out of control (if there is such a thing as too much dessert). Plus, I realize that I have given away my weaknesses by blogging primarily about pizza and cookies. I see now that these trends make me seem a bit like, oh I don't know, a seven-year-old child. I'm cool with that, but I'm sure my readership would appreciate a little variation. Don't worry! I won't lose all the dessert; I can't live without it. Want to know what else I can't live without? Bagels.


Today's mix-it-up-a-bit recipe was a total blog theft. By clicking around a little bit on facebook, I came across these homemade bagels on an acquaintance's blog and I though I'd give them a try. Bagels fresh from my oven? Yes, please!

They are shockingly simple, though slightly time-consuming. And, I can guarantee that most bakers will have all the ingredients easily accessible. Let's make bagels.

Homemade Honey Wheat Bagels (This recipe is a modification of the recipe found here):

1 1/2 cups whole wheat flour
2 3/4 cups all-purpose flour (roughly . . . I honestly have no idea where they got this measurement)
2 packages active dry yeast (each package is 1/4 oz.)
1 1/2 cups warm water
3 Tbs. honey
1 Tbs. salt
1 tsp. sugar
1 Tbs. molasses

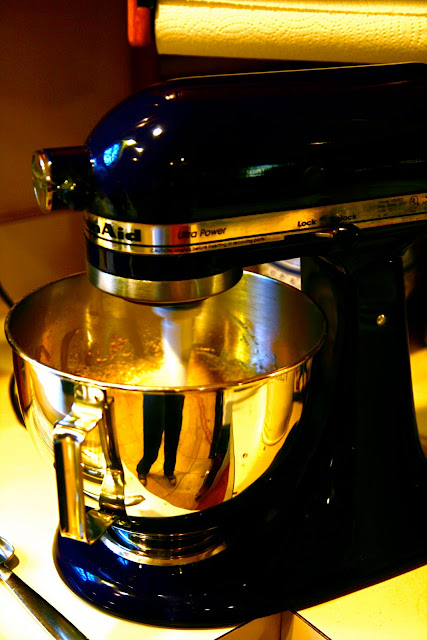
In the bowl of your mixer, whisk together the Wheat Flour and the Yeast.
In a separate medium bowl, whisk Water, Honey, and Salt together (I love that the flavors inside these bagels are simply honey and salt).


Add the warm water solution to the dry ingredients.
Beat with the mixer for half a minute on low speed.
Scrape the sides of the bowl clean.
Beat at a medium-high speed for 3 minutes.


(Do you like my Chucks?)

Then, by hand, mix in enough All-Purpose Flour to make a moderately stiff dough (See what I mean? I have no idea how much additional flour I added in the end. Just do it by feel, I guess).


Turn dough out onto a lightly floured surface and knead until smooth and elastic (about 8-10 minutes).


Cover and let rest for 30 minutes.


It will expand dramatically and look beautiful when uncovered.


Cut risen dough into 9 to 12 equal portions (I did 12, but kind of wish I had done fewer, larger bagels).
Shape portions into smooth balls.
Poke a hole in the center with your finger and enlarge the hole while working the bagel into a uniform shape (I swung it about my finger to stretch it, which worked really well).


Cover dough rings and allow to rise for an additional 30 minutes.


Meanwhile, start to bring a gallon of water to a boil and preheat the oven to 375º.
Add the Sugar and Molasses to the water pot, stirring to dissolve.


(I just thought the molasses looked cool on the bottom of the pot. Right?)

Reduce to a low boil.
When the bagels have risen, put 4 bagels in the water and boil for 2-3 minutes.


The bagels will expand in the water, so be sure to use a pot that gives them plenty of space to do so.


Turn bagels over and boil for an additional 2-3 minutes (Here mine looked a little wrinkled).


Remove from the water and drain the bagels on a towel for a few minutes, turning once.


Sprinkle the top with whatever flavor you like best (e.g. kosher salt, brown sugar, poppy seeds, parmesan cheese, etc.).
Place on a greased cookie sheet OR a "cornmealed" pizza stone and bake for 30-35 minutes (keep your eye on them!).

Here is the result on a pizza stone (The outside is crisp and the center is fluffy and wonderful! The bagels pictured at the top of the blog are from the batch I baked on a greased cookie sheet. The major difference between the two was the bottom of the bagel. The cookie sheet ones had a slightly harder bottom . . . but I did cook them a little longer, too):


**(Someone please try this method below and let me know how they turn out. I kinda wish I had done this with a few to see what would happen) For a glossier surface, place the raised bagels on an ungreased baking sheet prior to boiling them. Broil five inches from heat for 1-1.5 minutes on each side. Then put them into the hot water to be boiled as above. NOTE: They will need less baking time in this case, 20-25 minutes.

I'd also love to see how they turn out with various flavors: plain? egg? blueberry (my favorite)? cinnamon raisin? The possibilities are endless.

Tuesday, January 26, 2010

"For those who dote on Peanut Butter Cookies . . . "

Today's title is a direct quotation from the instructions of my latest creation found in Joy of Cooking, 1974 Edition:


 I decided to give other editions of Joy a chance (mostly because I don't have the 1976 version anywhere close at hand right now). That introduction to the preparation of these cookies was reason enough for me to try them out. I'm glad I did.


Most good bakers I know have tried-and-true Peanut Butter Cookie recipes under their belts. I have a couple to pick from that I know are delicious, but I wanted to try something new for my edification and your benefit. I also wanted something pretty basic, and I knew I could count on the Joy of Cooking to provide simplicity (I wasn't feeling especially gourmet last night). I was actually feeling so grumpy that I flat-out told my husband that I wasn't going to take any pictures. Humphhh! He graciously offered to be the photographer instead, as long as I would go retrieve the camera. I whined for a few seconds, but finally grabbed the camera and, in the end, he accomplished all of the following:
  1. Helped cheer me up.
  2. Took loads of "stock" photos for the eventual expansion of this site.
  3. And even got me geared up to take some of my own shots of the preparation. 
It helps that he also took on some of the more tedious parts of the recipe: sifting, pan-greasing, dough-ball-making, fork-pressing, etc. God Bless Penn (for those who may not know, I'm not blessing a university or a state here . . . my husband's name is Penn)! Needless to say, some of the following photos were taken by my creative husband, the inspiration for my making Peanut Butter Cookies in the first place!

I hope you enjoy Crankiness-Squelching Peanut Butter Crumble Cookies (The elements of this recipe are taken directly from Joy of Cooking, 1974 Edition, page 658, "Cookies and Bars" section):

1/2 cup light brown sugar
1/2 cup granulated sugar
1/2 cup butter
1 egg
1 cup peanut butter (I used extra chunky, but creamy would be really good, too)
1/2 tsp. salt
1/2 tsp. baking soda
1 1/2 cups sifted flour (Sift before measuring . . . Believe me, it makes a massive difference)
1/2 tsp. vanilla (Am I the only one who always intentionally over-flows the measurement of vanilla??)

Sift Brown Sugar and Granulated Sugar together (Weird, huh? It's actually kinda hard because the white sugar falls right through the holes and the brown sugar won't go through without the application of major force. I recommend putting as-fresh-as-possible brown sugar down first, then adding the white sugar, and sifting twice to ensure mixed-ness).
Beat Butter in mixer until soft (I love the look of creamed butter).


Add the sugars gradually and blend these ingredients until creamy.
Add the Egg and beat until fully incorporated.


Beat in the full cup of Peanut Butter.


Mix in the Salt and Baking Soda.


 Sift and then measure the Flour.


Add the flour slowly to the batter along with the Vanilla. Mix well until a (gorgeous) manageable dough forms.


Roll the dough into small balls and place them on a greased cookie sheet. Press them flat with a fork, as illustrated on page 656 (totally useless to you, but see below for technique).


**This is where I added chocolate chips to the top of 1/2 of them to meet my chocolate quota for the day. Omit if you prefer the cookie plain.

Bake for about 7-9 minutes, or until they have a very light, golden edge (Cooking on the longer end of this range ensures a crisp, crumbly cookie. If you prefer a little bit of chew to them, you have to literally undercook these babies).

Remove directly to a cooling rack and allow to cool for a few minutes.
Then, just try not to eat all of them in one sitting.
**These are definitely drink-accompanied cookies. Try them with lots of milk, coffee, or tea to heighten your experience! They are calling to you . . .