Learning about food, photography, and writing. Sharing what I find.

˜˜˜

Thursday, January 28, 2010

Honey Wheat Bagels

Ok, so I want to continue refining my baking skills, but the sweets are getting a little out of control (if there is such a thing as too much dessert). Plus, I realize that I have given away my weaknesses by blogging primarily about pizza and cookies. I see now that these trends make me seem a bit like, oh I don't know, a seven-year-old child. I'm cool with that, but I'm sure my readership would appreciate a little variation. Don't worry! I won't lose all the dessert; I can't live without it. Want to know what else I can't live without? Bagels.


Today's mix-it-up-a-bit recipe was a total blog theft. By clicking around a little bit on facebook, I came across these homemade bagels on an acquaintance's blog and I though I'd give them a try. Bagels fresh from my oven? Yes, please!

They are shockingly simple, though slightly time-consuming. And, I can guarantee that most bakers will have all the ingredients easily accessible. Let's make bagels.

Homemade Honey Wheat Bagels (This recipe is a modification of the recipe found here):

1 1/2 cups whole wheat flour
2 3/4 cups all-purpose flour (roughly . . . I honestly have no idea where they got this measurement)
2 packages active dry yeast (each package is 1/4 oz.)
1 1/2 cups warm water
3 Tbs. honey
1 Tbs. salt
1 tsp. sugar
1 Tbs. molasses

In the bowl of your mixer, whisk together the Wheat Flour and the Yeast.
In a separate medium bowl, whisk Water, Honey, and Salt together (I love that the flavors inside these bagels are simply honey and salt).


Add the warm water solution to the dry ingredients.
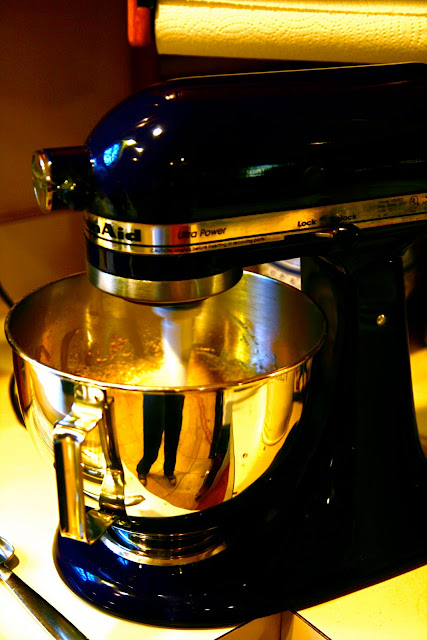
Beat with the mixer for half a minute on low speed.
Scrape the sides of the bowl clean.
Beat at a medium-high speed for 3 minutes.


(Do you like my Chucks?)

Then, by hand, mix in enough All-Purpose Flour to make a moderately stiff dough (See what I mean? I have no idea how much additional flour I added in the end. Just do it by feel, I guess).


Turn dough out onto a lightly floured surface and knead until smooth and elastic (about 8-10 minutes).


Cover and let rest for 30 minutes.


It will expand dramatically and look beautiful when uncovered.


Cut risen dough into 9 to 12 equal portions (I did 12, but kind of wish I had done fewer, larger bagels).
Shape portions into smooth balls.
Poke a hole in the center with your finger and enlarge the hole while working the bagel into a uniform shape (I swung it about my finger to stretch it, which worked really well).


Cover dough rings and allow to rise for an additional 30 minutes.


Meanwhile, start to bring a gallon of water to a boil and preheat the oven to 375º.
Add the Sugar and Molasses to the water pot, stirring to dissolve.


(I just thought the molasses looked cool on the bottom of the pot. Right?)

Reduce to a low boil.
When the bagels have risen, put 4 bagels in the water and boil for 2-3 minutes.


The bagels will expand in the water, so be sure to use a pot that gives them plenty of space to do so.


Turn bagels over and boil for an additional 2-3 minutes (Here mine looked a little wrinkled).


Remove from the water and drain the bagels on a towel for a few minutes, turning once.


Sprinkle the top with whatever flavor you like best (e.g. kosher salt, brown sugar, poppy seeds, parmesan cheese, etc.).
Place on a greased cookie sheet OR a "cornmealed" pizza stone and bake for 30-35 minutes (keep your eye on them!).

Here is the result on a pizza stone (The outside is crisp and the center is fluffy and wonderful! The bagels pictured at the top of the blog are from the batch I baked on a greased cookie sheet. The major difference between the two was the bottom of the bagel. The cookie sheet ones had a slightly harder bottom . . . but I did cook them a little longer, too):


**(Someone please try this method below and let me know how they turn out. I kinda wish I had done this with a few to see what would happen) For a glossier surface, place the raised bagels on an ungreased baking sheet prior to boiling them. Broil five inches from heat for 1-1.5 minutes on each side. Then put them into the hot water to be boiled as above. NOTE: They will need less baking time in this case, 20-25 minutes.

I'd also love to see how they turn out with various flavors: plain? egg? blueberry (my favorite)? cinnamon raisin? The possibilities are endless.

Tuesday, January 26, 2010

"For those who dote on Peanut Butter Cookies . . . "

Today's title is a direct quotation from the instructions of my latest creation found in Joy of Cooking, 1974 Edition:


 I decided to give other editions of Joy a chance (mostly because I don't have the 1976 version anywhere close at hand right now). That introduction to the preparation of these cookies was reason enough for me to try them out. I'm glad I did.


Most good bakers I know have tried-and-true Peanut Butter Cookie recipes under their belts. I have a couple to pick from that I know are delicious, but I wanted to try something new for my edification and your benefit. I also wanted something pretty basic, and I knew I could count on the Joy of Cooking to provide simplicity (I wasn't feeling especially gourmet last night). I was actually feeling so grumpy that I flat-out told my husband that I wasn't going to take any pictures. Humphhh! He graciously offered to be the photographer instead, as long as I would go retrieve the camera. I whined for a few seconds, but finally grabbed the camera and, in the end, he accomplished all of the following:
  1. Helped cheer me up.
  2. Took loads of "stock" photos for the eventual expansion of this site.
  3. And even got me geared up to take some of my own shots of the preparation. 
It helps that he also took on some of the more tedious parts of the recipe: sifting, pan-greasing, dough-ball-making, fork-pressing, etc. God Bless Penn (for those who may not know, I'm not blessing a university or a state here . . . my husband's name is Penn)! Needless to say, some of the following photos were taken by my creative husband, the inspiration for my making Peanut Butter Cookies in the first place!

I hope you enjoy Crankiness-Squelching Peanut Butter Crumble Cookies (The elements of this recipe are taken directly from Joy of Cooking, 1974 Edition, page 658, "Cookies and Bars" section):

1/2 cup light brown sugar
1/2 cup granulated sugar
1/2 cup butter
1 egg
1 cup peanut butter (I used extra chunky, but creamy would be really good, too)
1/2 tsp. salt
1/2 tsp. baking soda
1 1/2 cups sifted flour (Sift before measuring . . . Believe me, it makes a massive difference)
1/2 tsp. vanilla (Am I the only one who always intentionally over-flows the measurement of vanilla??)

Sift Brown Sugar and Granulated Sugar together (Weird, huh? It's actually kinda hard because the white sugar falls right through the holes and the brown sugar won't go through without the application of major force. I recommend putting as-fresh-as-possible brown sugar down first, then adding the white sugar, and sifting twice to ensure mixed-ness).
Beat Butter in mixer until soft (I love the look of creamed butter).


Add the sugars gradually and blend these ingredients until creamy.
Add the Egg and beat until fully incorporated.


Beat in the full cup of Peanut Butter.


Mix in the Salt and Baking Soda.


 Sift and then measure the Flour.


Add the flour slowly to the batter along with the Vanilla. Mix well until a (gorgeous) manageable dough forms.


Roll the dough into small balls and place them on a greased cookie sheet. Press them flat with a fork, as illustrated on page 656 (totally useless to you, but see below for technique).


**This is where I added chocolate chips to the top of 1/2 of them to meet my chocolate quota for the day. Omit if you prefer the cookie plain.

Bake for about 7-9 minutes, or until they have a very light, golden edge (Cooking on the longer end of this range ensures a crisp, crumbly cookie. If you prefer a little bit of chew to them, you have to literally undercook these babies).

Remove directly to a cooling rack and allow to cool for a few minutes.
Then, just try not to eat all of them in one sitting.
**These are definitely drink-accompanied cookies. Try them with lots of milk, coffee, or tea to heighten your experience! They are calling to you . . .


Friday, January 22, 2010

A Family Classic (Gingersnaps)


Believe it or not, most of the baking in my childhood home was my father's doing. It's probably a combination of things:
  1. Decades of watching and smelling his Italian mother bake cookie after cookie.
  2. The example of a Scottish father who, for many years, made his living as a chef to the elite on The Cape (Cape Cod for you people who may have another cape you consider the cape).
  3. And, consequently, the ingrained sweet tooth he, to this day, just can't resist.
My father passed his skills and said "tooth" on to my middle sister, who continues to bake like it's her job—a rather apropos cliché, I do believe. I have had many a delicious baked-good prepared by my father and sister alike, a feat of which I am insanely jealous (sometimes they let me grease the pans).

My mother, on the other hand, didn't know what dessert was until she met my father (Perhaps a slight exaggeration and even less impressive when you know they met around the age of 14). For example, when she was little, she dreaded getting medicine in the nurse's office not because of the gagable taste, but because they drizzled it on a sugar cube for ease of ingestion. Even now, almost thirty-five years into a marriage to the Duke of Dessert, she only has about eight sweet items she enjoys. But still, in her defense, there were very few bakers to emulate on her side (Sorry, Tabor/Richards). Nonetheless, one of my absolute favorite cookies of all time, The Gingersnap, is a Richard/Tabor family classic that has been perfected and served by my mother to the delight of three generations.

Allow my mother to tell you the story:

"I figure I first made these about 30 years ago (at your age) for my Pop. They were his favorite cookie to dip into hot tea. True to his English roots, he drank tea all day. His first cup was in bed, brought to him by his adoring wife. (She used to set the cup on the nightstand and turn it so the handle was within easy reach.) The teakettle was always hot in the Richard house." -Dana, Mama

(Don't you just wish you were a fly on the wall during those simpler, more intentional times?)

It's not exactly a secret family recipe, but it is hard to find in print.

The first time I found out that these gems were from Joy of Cooking, I was a little amazed. I was excited, though, because I owned my very own copy! I went in search of the recipe and it wasn't there. In fact, I have looked in three other editions of Joy and haven't found this precise recipe in any of them. So, apparently Joy of Cooking, 1976 Edition is the only one worth owning (in my humble opinion).

Here they are: Gingersnaps (Joy of Cooking, 1976)

Preheat oven to 325º.

Cream together:

            ¾ cup butter
            2  cups sugar

Stir in:

            2 well beaten eggs
            ½ cup molasses (with a little extra drizzle for good measure)
            2 tsps. vinegar (Apple cider? White? You decide.)


Sift and add:

            3 ¾ cups all-purpose flour
            1 ½ tsps. baking soda
            2 to 3 tsps. ginger (The more the better, in my view! Frontier makes an excellent line of spices and I especially love their ground ginger.)
            ½ tsp. cinnamon
            ¼ tsp. cloves


Mix ingredients until blended.  Form dough into ¾ inch balls. 


Baked on  a greased cookie sheet about 12 minutes (shorter for chewier, longer for snappier!). 


As the ball melts down during baking, the cookie develops the characteristic crinkled surface. Cool on the sheet for a few minutes and then transfer cookies directly onto cooling rack (from whence my husband will consume as many as he can before they cool entirely).


Isn't that just so delightfully simple? You won't be disappointed.

Thursday, January 21, 2010

Naaaaaaaaaaaaaan!

My plea for Naan assistance has been answered and the recipe card slot for delicious Naan has been filled! Thank you, UncleCharlieDad, for finding the recipe, daring me to make it, braving the 550º oven for me, and enjoying the results with me.


I got a call yesterday from my father-in-law, the aforementioned donor of Naan info., asking me to prep some dough during the afternoon in hopes of a second, more successful try at Naan pizzas for dinner. He had been previously convinced that Naan would make a fantastic base for a pizza to emulate the Neapolitan crust my husband and I came to love at Pizzeria Charlie in our four-month hometown of Orvieto, Italy (Since moving back from Orvieto, we have discovered 2 Amys pizza in NW Washington, DC. This place offered my husband and me a seamless transition back into Stateside life after our at-least-once-a-week visits to Pizzeria Charlie, only a block from our monastery home. Thank God for 2 Amys!). So, ready to bake, I went to the link he had provided in response to my request for Naan recipes (Found at the bottom of my very first blog entry about Caprese Salad). I had watched this entertaining YouTube Video starring Chef Sanjay Thumma when Dad originally posted it, but viewing it as an instructional guide to actually making Naan was quite a trip. I encourage you to watch the video when you attempt this recipe because his explanations are fun and interesting. BUT, I also encourage you to have my instructions close at hand because he leaves a few things out like, you know, measurements.

Listen to me. The girl who hates measuring complaining about no measurements! I'm growing!

Here it is. My favorite bread of all time—now conveniently make-able in my own home—Naan.

(Please bear in mind that most of these measurements are estimates, based upon the visuals from Chef Thumma and my successful batch yesterday)
  • 2 lbs bread flour (Chef Thumma used all purpose flour, but I really liked the results with bread flour. Also, I determined the total flour only after I had liquid left over when my first bowl-full of flour became sticky dough. So, I poured another bowl of flour and used up the liquid instead of discarding it. This is how much I love Naan.)
  • 2 1/2 cups warm water
  • 1 packet quick-rise yeast
  • 1 heaping spoonful of sugar (I used a literal tea spoon, not a measuring utensil, just like Chef Thumma)
  • 1 slightly-less heaping spoonful of salt
  • 1/2 cup milk (whichever percentage fat your prefer)
  • 1 large egg
  • 1/2 cup vegetable oil
Place most of Flour in large bowl, reserving about 3 oz. for later use.
Set both aside.
Pour Warm Water into medium bowl.
Add Yeast to water and gentle incorporate with a few swirls of the fingers.


Allow yeast and water to sit for a minute or two while you gather the other ingredients (Isn't yeast an interesting thing? I still hate having to wait for it, but it's an interesting thing nonetheless).
Stir Sugar and Salt into warm water mixture.
Add Milk to warm water mixture and stir gently.
Add Egg and beat gently until it is mostly broken-up and incorporated into other liquids.
Add 1/4 cup of the Vegetable Oil and stir in gently (Sorry there are no pictures of this process; it wasn't very pretty and I was too busy panicking about his detail-less preparation! SIDE NOTE: Words that end in "c" normally, but add a "k" in different forms are some of my favorite words. NERD ALERT!).
Create a well in your pile of flour and, in several small installments, add the warm liquid, mixing gently and slowly with your hand. It will be very sticky.


Once a (very sticky) dough has been formed, drizzle the remaining oil over the dough, COVER, and allow to rest for about 30 minutes.


Once rested, remove cover and turn the dough over a few time to distribute the oil that hasn't seeped in.
Separate the dough into 5 or 6 even sections by covering your fingers and each portion you are extracting with the reserved flour. This will remove the stickiness and allow you to shape the balls of dough into smooth rounds.
Place the rounds onto a floured surface.


Cover the rounds with a towel and allow to rise for 1-2 hours. I know this is a long span, but I was done with this recipe much sooner than I thought I would be, so mine sat from 4:30pm to 6:30pm when the gentleman came to help me turn these into pizzas! They almost doubled in size during that period, so give them space to expand.

**I did do one of these rounds as a plain Naan before the gentleman got home, so that's the picture you see at the top (I forgot to take a picture before I dove into this buttered goodness . . . sorry about the bite mark).
To accomplish the plain Naan, I used Chef Thumma's second method of cooking: Stove Top. You can also cook it in a very hot oven (as high as it will go) on a non-stick cookie sheet, flipping once to cook evenly (see his video).
I stretched the dough out as evenly as I could and placed it on top of the largest mesh splatter-guard I could find.
This I placed directly over the flame of a gas burner.
Always moving the mesh in a circular motion over the flame, the bottom of the Naan began to brown.
I flipped the Naan and did the same thing on the other side.
Once it had cooled down a bit, I buttered the top and sprinkled it with a tiny bit of kosher salt.
It was so good I forgot to stop for a picture, as I stated above.

Then the boys came home! And this is what ensued (To see instructions for the preparation and cooking of homemade pizzas, see my entry from January 11, 2010):

Mozzarella, Fresh Tomato, & Basil Naan Pizza


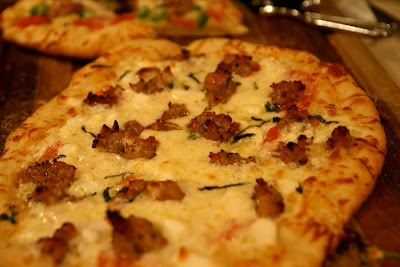
Mozzarella, Goat Cheese, Sausage, and Rosemary Naan Pizza


Mozzarella, Green Pepper, Fresh Tomato, Sausage, and Basil Naan Pizza


Mozzarella, Goat Cheese, Fresh Tomato, Sausage, and Basil Naan Pizza


We also did one as a Garlic & Butter Naan, following Chef Thumma's instructions for oven-baking. The flavor was astounding!

All-in-all, a pretty successful day of baking, I would say.


NOTE: If you try any of these recipes or think of a better way to do anything, please tell me! Comments are the most exciting part of my day.

Wednesday, January 20, 2010

Something Different . . . International Favorites

Today isn't about food I've made. Rather, it is about food that I will spend my whole life trying to replicate but most likely never quite recreate. These are the delicacies of the lands I have been privileged enough to visit; they are the secret gastro-gems of the tiny cafes in Paris, the culinary-creations of the dimly lit pubs in Prague, the cuisine-art of the pizza shop on the edge of a cliff in Italy. Every once in a while I will share one of these with you as a way of begging you to visit these places, to consume these treasures. I hope I will have a lifetime's worth of these discoveries to share with you, and I am on my way to a pretty good stockpile of suggestions.

Let's start in Paris. It ain't chronological, but it's necessary.


When my husband and I were heading to Paris for an eight night dream-come-true, we were coming off a period of four months in Italy and a week in Prague. Needless to say, our stomachs had been satisfied for that preceding period. We'd reveled in the gnocchi and spaetzle, but we were moving on to the city that created Julia Child and has defined culinary skill for generations. We were very lucky to have specific food suggestions going into our stay in Le Marais, Paris (Thanks, Ruth!) and I couldn't wait to try everything.

I can easily talk about the croissants for hours.


I can discuss the duck and the crème brûlée until I am blue in the face.


But, I was prepared for all those things. I knew their reputations and, of course, I was not disappointed. The surprises are the best, though. I had never heard of (never mind eaten) the Parisian "Macaron" cookie. I hate the American cookie of the same name, so I probably wouldn't have tried it if it weren't for our friend Ruth's emphatic suggestion. It is nothing like the American version, she insisted. Not even related!

Boy was she right.


We didn't find one of these green piles of joy until later in our trip. We were headed up to Montmartre to see the open air art market and Moulin Rouge, since we had exhausted most everything else down in our neighborhood. We took the Metro most of the way, but had to climb a good little hill to get from the night club section to the quiet hilltop neighborhood. We stopped for baguettes along the way at a tiny bakery situated on a 45º angled road up to Sacre-Coeur and the marketplace. That's when I noticed a small hand-written sign for "Macarons"! We scraped together enough Euro coins to get lunch and dessert and mustered-up enough self-control to finish our long, HOT climb up to a bench overlooking the entire city. We even managed to eat our baguettes before allowing ourselves a bite of Paris's hidden treasure. Right up until the moment I took my first bite, I was skeptical about just how much this thing could offer me. Then my teeth sunk into the most perfectly-textured cookie and most-perfectly whipped center cream. I can't and won't even try to tell you how delicious it was. I'll just beg you to try one.

Go to Paris. Take a long, sweaty walk. Find a little bakery. Buy out their supply of Macarons. Find a bench. Stare at the Eiffel Tower. Eat.